Video Notes:
Continue readinghalloween
Halloween Hussif
This is a digital pattern from Willoughby & Rose who can be found here on YouTube under the same name or at this website: https://willoughbyandrose.com/
Continue readingEpisode 68: OCTOBER
Filmed on Sunday, Sept 29, 2019
Western CT Yarn Crawl!
- This is an annual yarn crawl put on by the Western CT Yarn Council for 6-7 stores in Western CT. This year, the crawl ran from Thursday September 19 – Sunday September 22.
- This year, the passport was free and there was a $5 tote bag designed to hold a pin from each of the seven stores.
- Friday
- Westport Yarns – Westport, CT
- Didn’t buy anything at this location. It’s a smaller store in a wealthy area, so their stock is very targeted to the local clientele and is more expensive than other stores I’ve been to.
- Nancy O – Ridgefield, CT
- This store moved locations and the new location is really nice. It’s in this sort of plaza with lots of other small stores. It’s a larger space and this space is more handicap friendly with wider aisles inside the store. I didn’t end up buying anything at this store either, but Mom bought something.
- A Stitch In Time – Bethel, CT
- Gabby from Once Upon a Corgi was having her yarn crawl trunk show at this store and we ended up turning into the parking lot at the same time. Mom and I helped her set up for the day. The yarns had been out the day before, but that table needed to be cleared for knit night. I think we overwhelmed the shop staff a little because we just dove on in and got her set up.
- Meadowcroft Dyeworks Yarn Rehab Rockshelter Sock in “Rembrandt’s Prodigal Son” – just leapt out at me and wouldn’t let me leave it behind. It’s been a while since a single skein did that for me.
- New England Yarn and Spindle – Southington, CT
- Usually we visit this store with the other northwestern CT stores, but the Mum Festival was happening in Bristol that weekend and the area of Bristol affected is right on our route to and from the shop. Friday during the day was likely to be less of a traffic issue than on Saturday.
- Also, there’s an IHOP just down the street and pancakes for lunch in the best.
- Cascade Yarns ® Heritage – 5881 — I’ve been trying to supplement specific items in my stash and when I took stock early this year, I found that I had exactly 1 light colored skein to use for contrasting colorwork.
- Westport Yarns – Westport, CT
- Saturday
- Stars Hollow Yarns – New Preston, CT
- New shop! They just opened last December and it’s a nice shop. They’re currently showcasing BIPOC dyers, so they had The Farmer’s Daughter, Lady Dye Yarns, and Cashmere People front and center in the shop for the crawl. Pretty sure the whole shop was small dyer and small mill operations, but I can’t be 100% sure.
- Just some accessibility points – There are steps to get into the store and an upstairs loft, so it wasn’t wheelchair friendly. I don’t know if they have an accessible entrance on the side or back of the building, but it wasn’t readily apparent to me. Also, the lighting upstairs in the loft is dim, so that may be an issue if you have vision considerations affected by lighting.
- A note on this — I have, in the past, identified accessibility issues in yarns stores I’ve been to on Yarn Crawls before, but if you have questions about accessibility at the yarn stores I mention, please ask! I’d rather answer repeat questions or revisit the stores to confirm accessibility so that you don’t end up wasting your time visiting a store that you physically can’t navigate
- The Farmer’s Daughter Fibers Juicy DK “Porch Pumpkin”
- Round Mountain Fibers Spruce Fingering “Dark Gray”
- In Sheep’s Clothing – Torrington, CT
- 3 balls Noro Ito for a blanket
- PRIZE!
- Kit & Pearls – Avon, CT
- Finished out the crawl!
- Stars Hollow Yarns – New Preston, CT
Dye Stuff
- Indigo Dye – Used pre-reduced indigo crystals from Dharma Trading Co and followed the directions on their website. In the future, I’ll be reducing the amounts in the recipe to half or a quarter because after all these items, I was still getting strong color within 5 minutes of the materials being in the dye vat. I wasn’t in a place to store the vat properly, so I ended up disposing of a lot of good dye.
- Fabric – would absolutely do again
- Solid/semi-solid dye
- Muslin shibori/resist dye – thread drawn
- Shibori/resist dye napkins – pressed tiles
- Shibori/resist dye other fabrics – pressed tiles
- Yarn – like the colors, but problems rinsing out the excess indigo particles
- Sweater Quantity Targhee
- BFL/BFL overdye
- Mohair dye/overdye
- Cellulose fibers/overdye
- Fabric – would absolutely do again
- Pokeberries
- Three stalks of berries, mashed with water in the sun for two or three weeks – deep reddish purple
- Approximately 8% alum to water in the sun for two weeks
FOs
- Two stranded colorwork hat – Brother KH836e knitting machine – punch card 2D, Dial 8 – Once Upon A Corgi “Dark Like My Soul” and “Snow Scout”
- Comfort Fade Cardi by Andrea Mowry – Once Upon a Corgi Handmade yarns (Queequeg/Briny Beach,Tomorrow I Shall Be Fetterless/Lemony Snicket, Miracles and meatballs/ Ghoul Haunted Woodlands of Weir, Dark as a Crow at Night/ Dying to Burn at the Stake) – US 4/3.5 mm needle
- Simple Seed by Toni Lipsey – Blue Ridge Yarns Kaleidoscope Worsted leftovers – US J/6 mm
- Weaving pattern GW T001 S-XXL from GetWeaving – Sampled yarns, made a muslin, warped the loom, wove the fabric, reinforced and cut the fabric, assembled and hand-sewed – Cascade Yarns ® Ultra Pima Fine “Armada”, Classic Elite Yarns Bella Lino “Natural”, Classic Elite Yarns Firefly “Silver”, Elsebeth Lavold Hempathy “Palm Springs”, “White Beach”, and “Peacock Luck”, Plymouth Yarn Nettle Grove “31”, Schachenmayr Catania Solids “0419”, Scheepjes Catona “Emerald”
- Altar Cloth – Ashford 24” loom, low contrast houndstooth – Cascade Yarns ® Ultra Pima Fine “Armada”, Elsebeth Lavold Hempathy “Palm Springs” and “Peacock Luck”, Schachenmayr Catania Solids “0419”
WIPs
- Redford by Julie Hoover Machine Knit – Swatching and making mistakes at this point, decided to use the LK150 instead of the KH836e – Green Mountain Spinnery Lana in “Gris”
- FAIRY RING embroidery kit by cozyblue
- Yellow/White rolags – Electric Eel Nano wheel
- 501st fluffs – Electric Eel Nano wheel
- Half Square Triangle Quilt – Moda 5” charm squares, HSTs trimmed to 4”, started assembling motifs
Other Stuff
Stuff I’m Watching:
- The Dark Crystal: Age of Resistance
Stuff I’m Listening To:
- White Fragility by Robin DiAngelo narr by Michael Eric Dyson
- Race Matters by Cornel West narr by Cornel West, LD Jackson
- The Song of Achilles by Madeline Miller narr by Frazer Douglas
- Dracula and Carmilla by Bram Stoker, L Sheriden Le Fanu narr by Clive Hayward and Alison Larkin
- Eldest by Christopher Paolini narr by Gerard Doyle
- The Lion, The Witch, and The Wardrobe by C.S. Lewis narr by Michael York
- The Horse and His Boy by C.S. Lewis narr by Alex Jennings
Come join the Freakish Lemon Video Podcast group on Ravelry
Follow me as freakishlemon Instagram and Ravelry
Please remember to Subscribe on YouTube to be notified when I post new episodes
Transcript below:
Episode 45: Plans and Ramblings
Filming on 8/13/17
Podcast Stuff
- Blanket MAL 2017 – Started Jan 1st! There is a chatter/encouragement thread up in the Ravelry group and I’m planning on pulling prizes once a quarter for this MAL. #2017BlanketMAL
- #sithandspin – June 1st to August 31st! Spin on whatever as you turn to the Dark Side with your favourite Star Wars media.
- Giveaway! Go over to the Ravelry thread and answer the prompt: What yarny adventures or projects are you looking forward to in the coming season?
Life Stuff
- Hands – They are improving. Work has been exacerbating the issue with lots of repetitive hand movements this week, which has been annoying, but I’m trying to take care of them and working on my patience.
- Puppy Time – My parents were on vacation this past week, so my brothers and I were on our own. This meant lots of puppy time for me. Penny has particular people that she sticks to. Mom is Number One and she doesn’t like to leave Mom alone when she’s home, but Dad and I are pretty closely tied for Number Two, depending on the day and if Dad is cooking that day. I mean, she loves my brothers, but she’s not too fussed when they come and go.
Knitting Stuff
FOs
- Afterthought Everything Socks – Legacy Fiber Artz Advent Calendar colorway – US 0/2.0 mm needles
WIPs
- Akiko by Regina Moessmer – Lion Brand Scarfie (78/22 Acrylic/Wool) in 201 Cream Black – US 7/4.5 mm and US 8/5.0 mm needles
- Marled Magic Shawl by Stephen West – Scrap fingering and handspun – US 6/4.0 mm
- Dwarven Mittens by Ginger Monkey Knits – Plymouth Yarn Homestead Tweed – US 3/3.25 mm
- Rice Fields by Lady in Yarn – Legacy Fiber Artz Snazzy Toes “Mary Sanderson”, Legacy Fiber Artz Steeley Toes “Winnie Sanderson” and “Spellbook”, Berroco Ultra Alpaca Light black – US 3/3.25 mm
Crochet Stuff
- Scrap granny squares – Hook US H/5.00 mm
Fiber Stuff
- Lock spinning with my collection of cotswald, mohair, and wendsleydale locks
- Hedgehog Fibers Silk Hankies – drop spindling
Sewing Stuff
- Halloween Quilt edge scraps project bag
- Button down shirt pattern and prep
New Stuff
- Simplicity 1544 Mens shirt pattern
- McCall’s M6044 Mens shirt pattern
- 3 yards grey cotton
- 3 yards plaid cotton
- Knit Picks Wool of the Andes Sport in Hollyberry and Dove Heather- Christmas Sweater~~ Star Wars Sweater by Natalie Meredith
- Knit Picks Wool of the Andes Sport in Aurora Heather and Dove Heather – Soooo deadcatwithaflamethrower (who is a fanfic author and an original work published author who I follow) has been dragging me kicking and screaming back into the mire of HP fandom a bit and I’ve been feeling some Slytherin pride while reading her (epic) fics Swung by Serafim and Of a Linear Circle. I had made a Slytherin scarf when I first started knitting with some Red Heart Super Saver and I think Caron Simply Soft, but this was really before I knew anything about anything. There aren’t even any ends woven in on this thing, just knots where the colors change and I knit it in a tube so I didn’t have to deal with the ends. It’s about time to remake this project so that I have some actually wearable Slytherin stuff come winter.
- Once Upon a Corgi – Poe Club – Oliver Base (SW Merino single) – Tomorrow I Shall Be Fetterless
- HopeSick.Com enamel pins – McDonald’s Nugget Buddies Halloween and Horror from the Pagemaster
Other Stuff
Stuff I’m Listening To:
- Spines
- Two months ago, Wren woke up covered in blood, suffering from memory loss, and surrounded by the remnants of some strange cult ritual. SPINES is the story of her search for answers, and the deadly, powerful people she encounters along the way.
Stuff I’m Watching:
- Game of Thrones
- Sense8 Season 2
Stuff I’m Reading:
- Heir to the Empire ( The Thrawn Trilogy Bk 1) by Timothy Zahn (audio) narr by Marc Thompson
- Dark Force Rising (The Thrawn Trilogy Bk2) by Timothy Zahn (audio) narr by Marc Thompson
- The Edgar Allan Poe Audio Collection (audio) narr by Vincent Price and Basil Rathbone
Fanfic Recommendation –
- Harry Potter and the Problem of Potions by Wyste
- Once upon a time, Harry Potter hid for two hours from Dudley in a chemistry classroom, while a nice graduate student explained about the scientific method and interesting facts about acids. A pebble thrown into the water causes ripples.Contains, in no particular order: magic candymaking, Harry falling in love with a house, evil kitten Draco Malfoy, and Hermione attempting to apply logic to the wizarding world.
Come join the Freakish Lemon Video Podcast group on Ravelry
Follow me as freakishlemon Twitter, Tumblr, Instagram, and Ravelry
Please remember to Subscribe on YouTube to be notified when I post new episodes
Halloween Cross-Stitch
Apparently, I completely neglected to make a post about my Halloween cross-stitch?
Good on me. Here you go!

Tada! I didn’t finish them by Halloween, of course. I finished these the week before Thanksgiving. Which is, you know… not what I planned at all, but I’m very pleased with how they turned out!
Both patterns are from The Frosted Pumpkin Stitchery and I enjoyed making them both immensely.


I got the frames in time to set these suckers up in the dining room for Thanksgiving. So we had decorations of pilgrims, turkeys, and Halloween cross-stitch.
.
The Winter Soldier
While the rest of the world seems to be dashing off to Christmas (insert rant about not being able to find good Thanksgiving decorations in November), I thought I’d take today to look back on Halloween.
Mostly because this folder of costume photos has been kicking around and I need to make a post about it.
Also, because I didn’t get a chance to show off my robot arm closer to Halloween.


Those are the good shots. And here’s a terrible full body one taken for the costume contest at work:

Ta da! And I thought, since I have this blog and all, I’d show you folks how I put together my cheap Winter Soldier costume.
Most of this costume is stuff that is really easy to get or something you might already own:
– Black boots
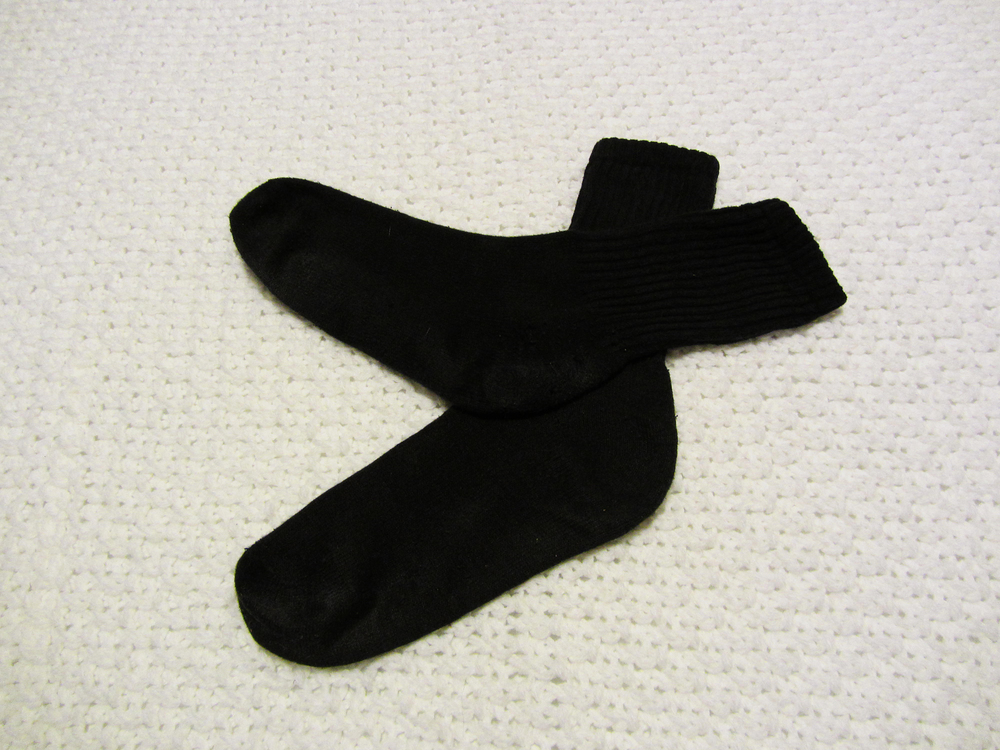
– Black socks
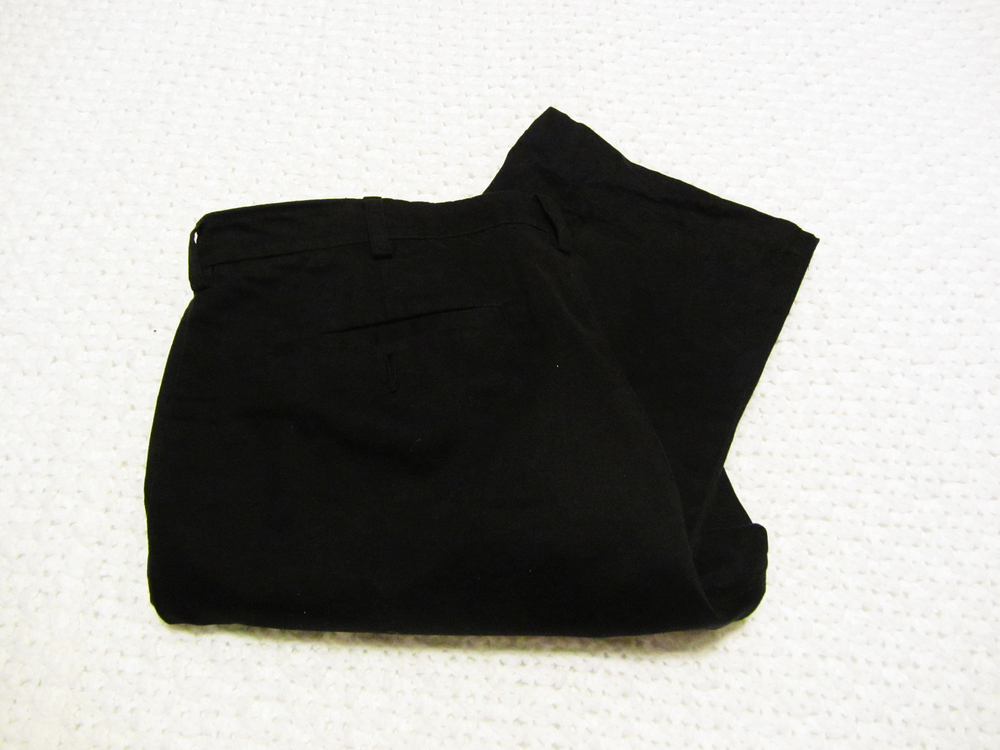
– Black pants
– Black fingerless glove
– Silver glove
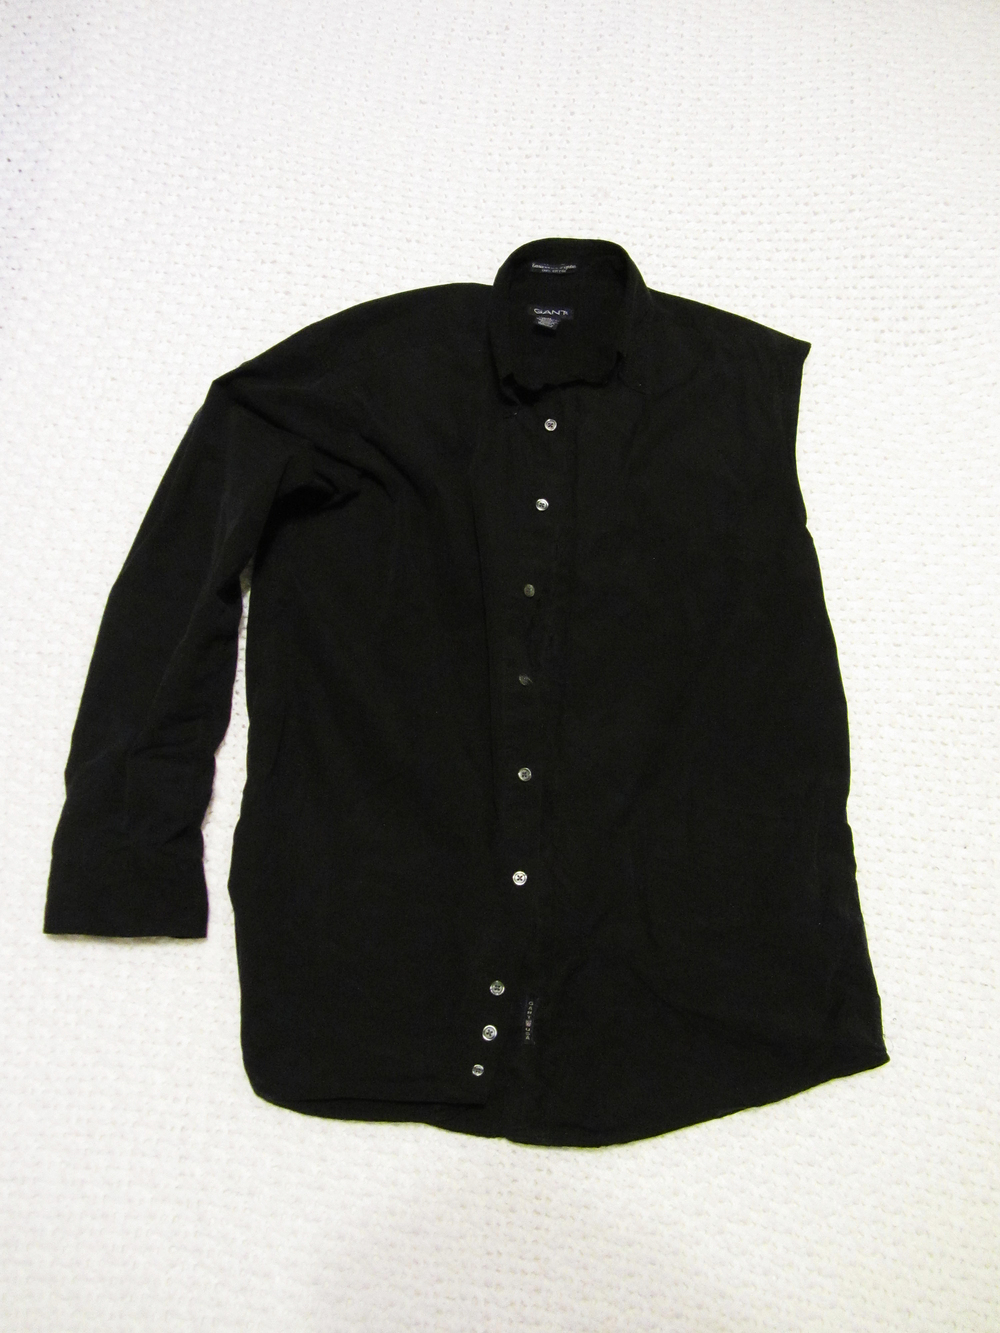
– Black button down shirt (that can be altered)
– Black Humvee combat vest
– Winter Soldier arm leotard thing
– Sunglasses
– Face mask


The sunglasses were an Ocean State Job Lot find for $2.00.
The black fingerless gloves are just a cheap pair of gloves that can be picked up practically anywhere with the fingers cut off. Not even hemmed or anything. They were a part of another costume a few years ago and I think a work friend picked them up for me for $1.00.
I already owned the silver gloves from an old costume; I just cut the left one down so that it wasn’t an elbow glove and hemmed the cuff. It’s not a neat cuff, but it’s hidden by the black fingerless glove. Silver gloves are pretty easy to find online if there’s no party store or costume shop nearby. A quick search shows them from $6.00 to $13.00.
The altered shirt is also really easy. I just cut off the left arm about an inch below the shoulder seam and hid my hemming stitches along the shoulder seam that was already there. I bought it at a thrift store for $4.00.
The Humvee combat vest was also a part of a costume a few years back, but my work friend found these at a surplus store for $25.00. It’s not as impressive as the Winter Soldier’s actual leather coat thing, but if you’re on a budget, it’s a good alternative.
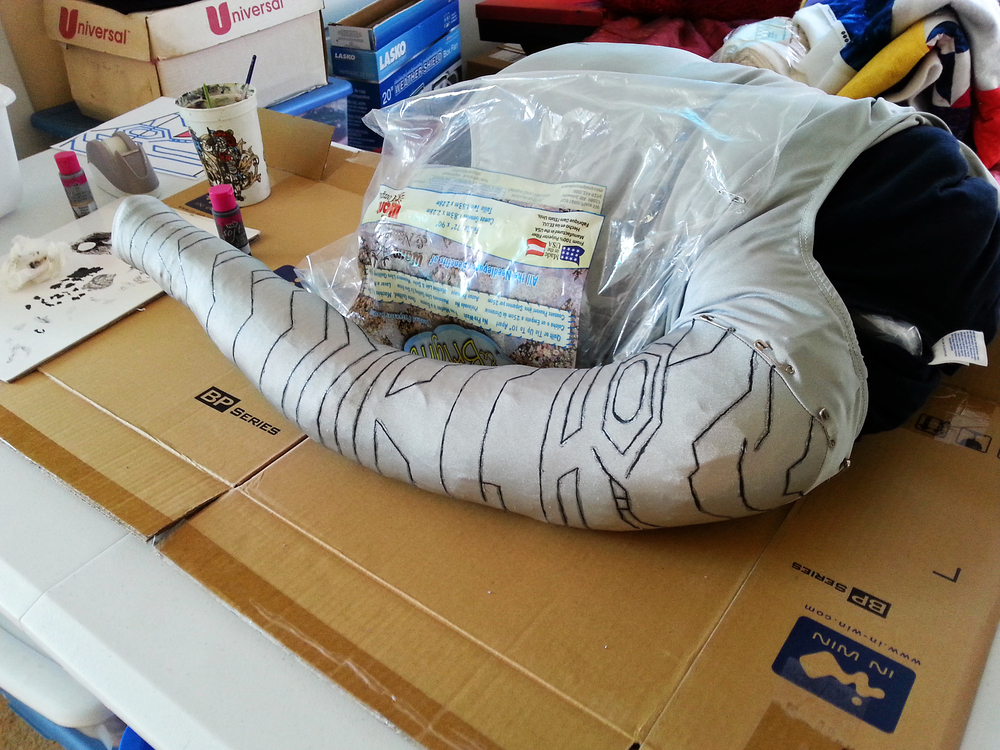
The arm is really where all the work and money went. There are some really great tutorials online for Winter Solider arms and I did take some direction from them, but my arm is not as detailed as many of the ones I had seen previously. I think this is a good alternative if you’re not sure how far you want to get into making this arm. I could definitely add more detailing and paint to this to make it more realistic if I was intending to wear this to a convention later.
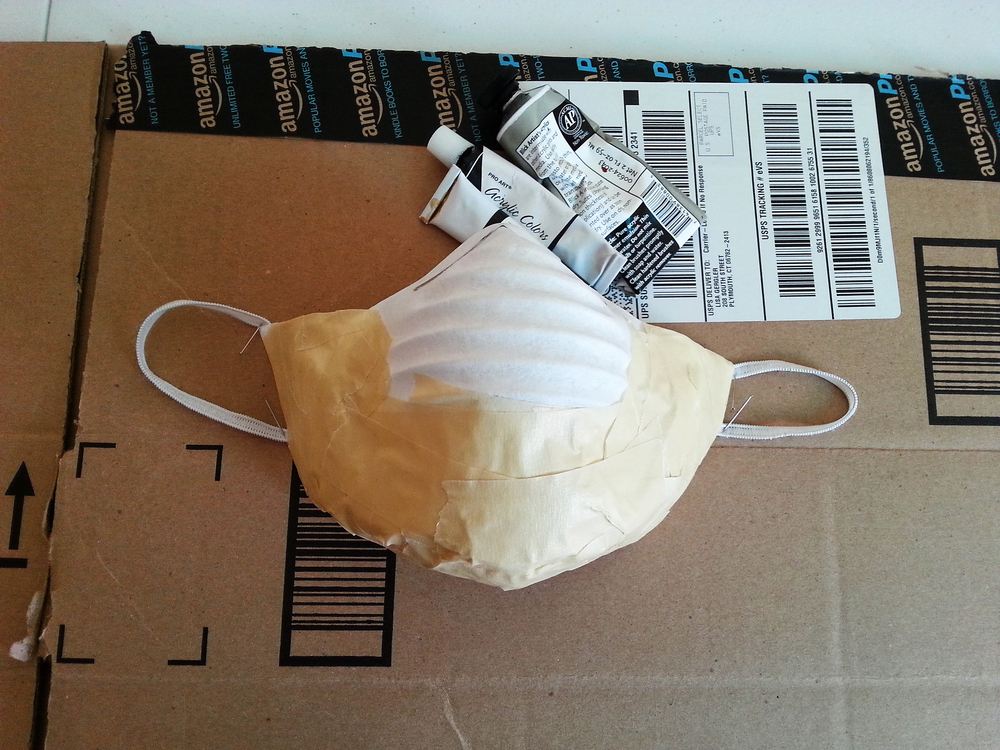
The first things I started with were a $4.00 long sleeved shirt from Ocean State Job Lot and a $40.00 silver leotard. White ones are cheaper, but I didn’t want to paint the whole arm for time reasons.
I used the $4.00 shirt to create an arm model for myself.

As you can see, it’s mostly masking tape and that shirt. There’s plenty of tutorials for making dummies of yourself online, so if you need some help with this part, there are lots of resources. I’d recommend having a friend help out with the arm dummy; I did it on my own and it was really hard to cut off the masking tape dummy up by the shoulder and neck.
I then put on my sweet, sweet leotard and stuck safety pins into key points on my arm: my wrist where my glove would reach, the inside of my elbow, the top of my shoulder, and approximately where the star might end up. I then dressed up my arm dummy and lined up all those points with the same points on the dummy.

I then drew out a diagram of the Winter Soldier’s arm in Adobe Photoshop and created a PDF that I could print out as a stencil. I’m going to make both the PDF and PSD available for free download at FreakishLemon.com for anyone who wants to play around with it. I have it sized to my arm, but if you’re familiar with Photoshop, you can alter it to fit your own arm measurements. The stencil print out for me took 6 pages (printed poster style).

I cut the stencil in half around where the elbow would be and lined it up with my arm dummy to check the measurements. If the points on the dummy and the points on the paper are far off, you might have to rework your stencil.

I then started cutting out each panel and pinning it to the arm dummy. I left spaces where the gaps in the plates (the blue lines on the paper) would be and taped the paper together where the ends meet on the back of the arm. It’s not exact, but it worked well enough for me. Put larger gaps where your arm will naturally bend.


And then I continued in the same way up the rest of the arm. The star is shown there, but I ignored the edges of the star in the next step. I left it there for the plates that go through the star. Once the whole thing is pinned together, I used fabric paint to paint the lines where the plates gap.

I did the first coat in a silvery fabric paint. I didn’t know how it would turn out, so if I really screwed up I could repaint the whole arm. I took it slow painting one side of the arm, letting it dry for half a day, and then painting the other side of the arm. Try to keep your hand steady as much as possible and don’t worry if it looks weird at this step. Just try to keep the line in the middle of the space between the paper pieces.

Once all the silver paint was dry, I took off all the paper pieces. The paint is different enough from the leotard that the lines were clear to follow. I then took a smaller brush and did a thing line of black fabric paint in the center of my silver lines. Again, first one side of the arm, waiting half a day for it to dry, and then the other side of the arm.
Once everything was dry, I printed out another copy of the arm star for a stencil and put on my fancy pants leotard with arm lines on it. I lined up where the star should go in the mirror and pinned the star in the right place with a couple of safety pins. I stuck the arm back onto the dummy and traced a star in red fabric paint. Once that was dry, I removed the star and painted in the rest of the red for the star. I goofed on my paint choice, so my Winter Soldier arm has some sparkles in the star, but it didn’t end up being all the visible against the leotard. I only painted the one coat of the red, so the coverage is slightly uneven. That was fine for me. It looks more like an inlay with very definite border lines in the movie, but I like the look of the star being painted on rather than built in.
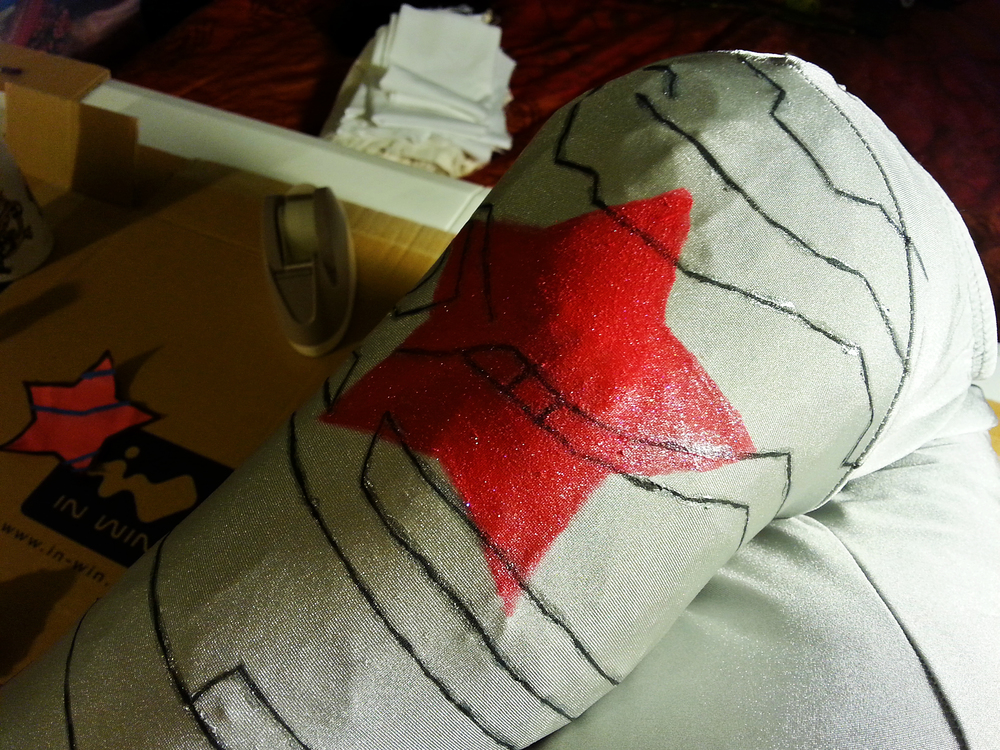
And that’s the arm!
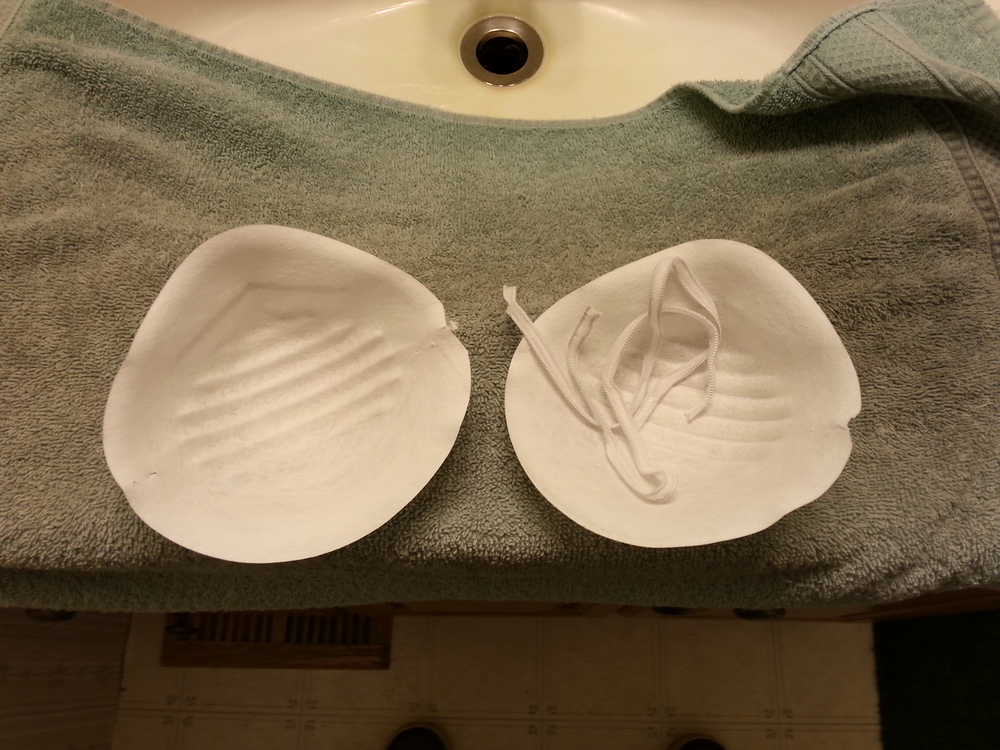
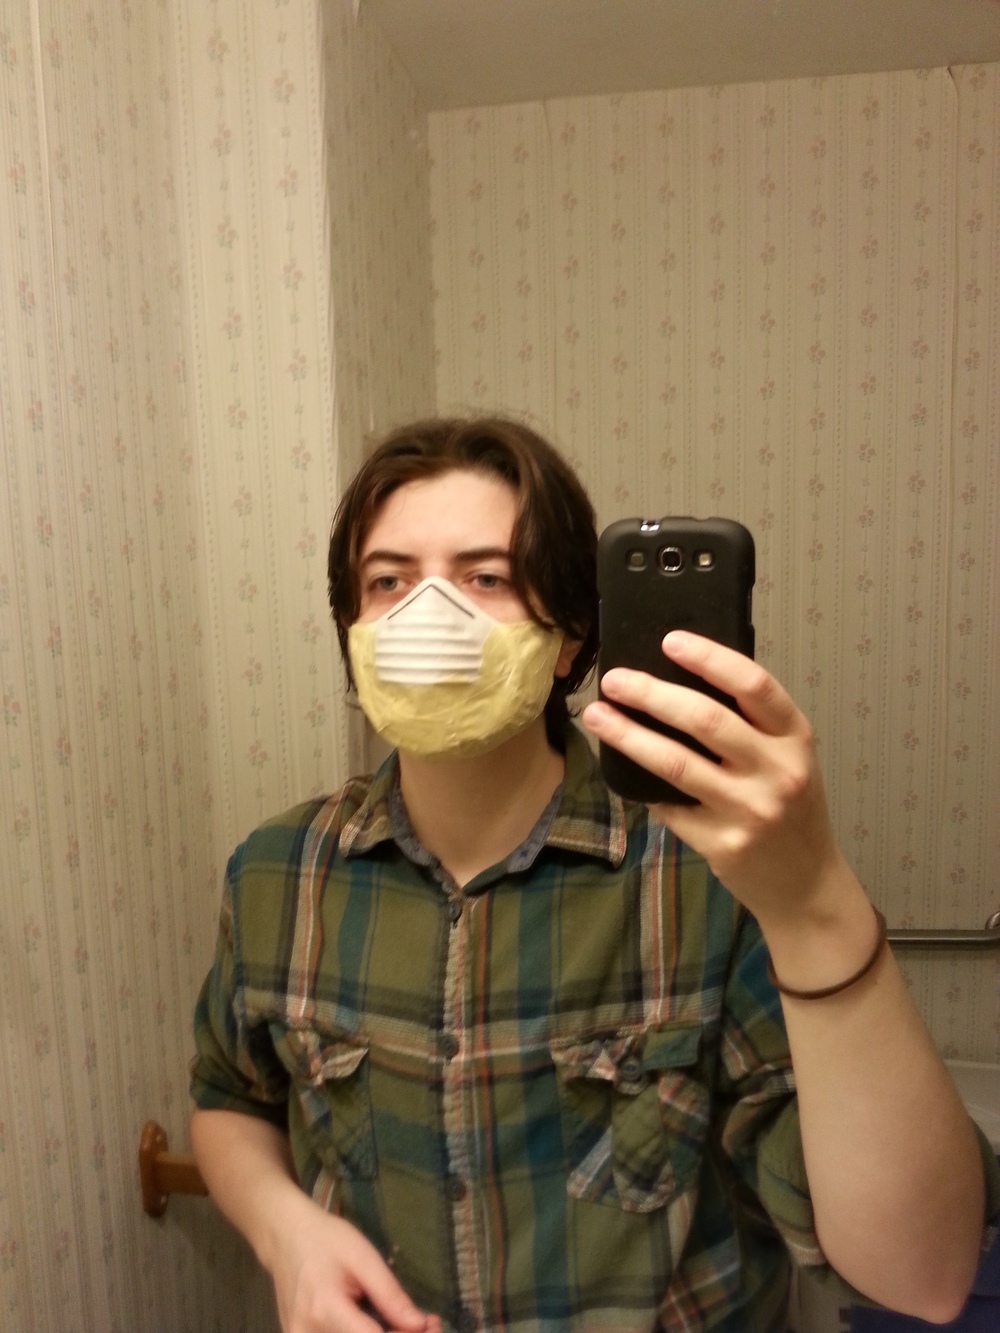
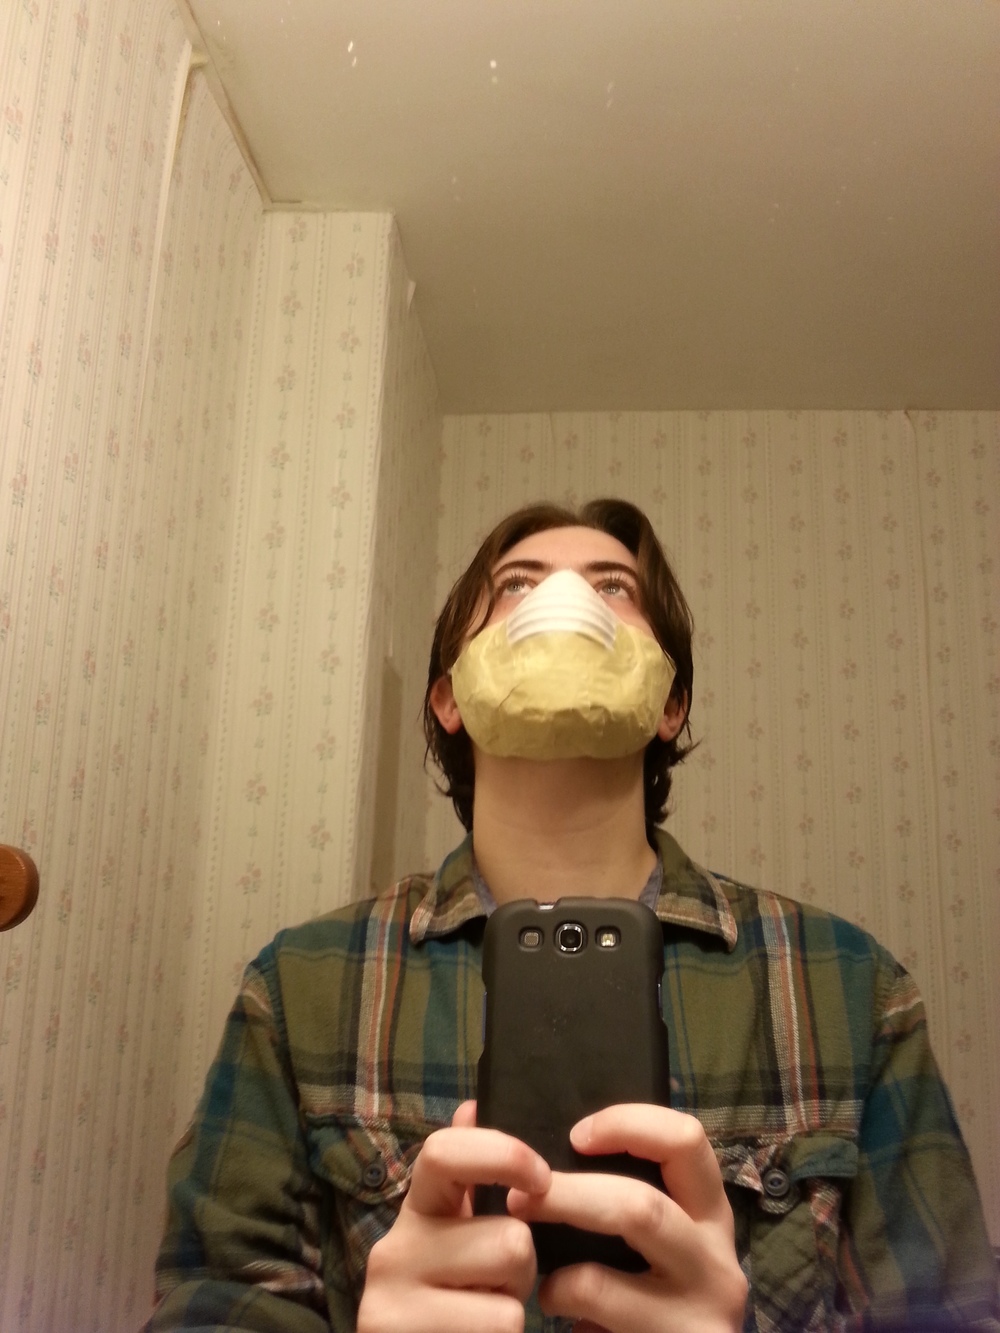
And the face mask ended up being the cheapest part of this costume. I bought a pack of 10 dust masks from the dollar store, chopped them up, taped them together, and painted them black. I only ended up using 3 masks. Here’s a series of photos of me putting them together and adjusting them to my face:


And that’s how I put together my Halloween Winter Soldier costume.

Also, that’s a record for the number of photos taken of me within one month. I felt absurd taking that many photos of myself. I’m not a fan of how I look in static images (or, you know, how I look in general). I’m a bit better about video due to YouTube video stint that lasted a few years before I drifted away from it, but I’ve always had a hard time with photos. It’s easier for me when I’m in costume, but even then it can be a bit much for me. I just don’t like my face.
But I find that I really like these photos of me with my face mostly covered. I mean, with the mask on, you’re missing out on the worst parts of my face, so my eyeballs and eyebrows look pretty good there. And my hair’s not too bad in the actual Halloween photos either.
But it’s still weird to post photos of myself online when I’ve spent so long avoiding photos of myself.
.
Autumn Scrap Garland How To
I have a tutorial for you today!
Sort of. I mean, it’s really easy to pull off and it looks pretty cool, so I thought I’d share how I made some autumn scrap garlands for decorating things.
Here’s what you need:

-Scrap fabric
-Thick Yarn
-Scissors
-Patience
-A large workspace
That’s it, folks. I used a long thick cut of yarn as my base for the garland because that’s what I had. The one you’re seeing in these photos is the one that I made for my cubicle at work, which measures a total of 4 yards (12 feet), but you can make them at any length you need. The ones on my windows that you’ll see in the final photos are about 4 feet long.
For fabric, I chose whatever I had on hand that looks autumn-ish. Yellow, orange, brown, black, red, little bit of green… Those kinds of colors. You can choose whatever colors you want or have for whatever season or holiday you like. If you don’t have a ton of scrap fabric like I do, you can get remnants or fabric quarters for pretty cheap at most fabric and craft stores. And if you have trouble matching colors, check out jelly rolls. At my local Jo-Anns’ a jelly roll costs about $10 and has a variety of matching/complimentary 2.5″ strips of fabric. I’ve used them for quilts, but they’d be great for a project like this.
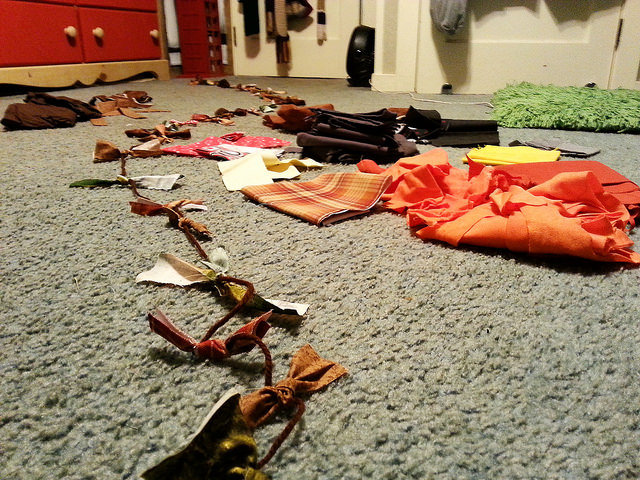
Cut a bunch of strips of fabric about 5″ long and 1″ or 1.5″ wide. Mine range from 4″ to 5.5″. You don’t have to cut them evenly at all. Some of my pieces are weird shapes because my fabric scraps did not all have square edges. There’s some triangles and trapezoids and half-circles in there.
I started with the fabric I had the least amount of so that I knew I could space it out evenly. I started tying scraps to the yarn about a foot apart. These are tied using a basic square knot. Once I had my first groups of scraps tied on, I started tying pieces halfway between each piece to slowly fill in the garland.

And just keep tying scraps to your yarn until you like how full the garland is. You can leave them spaced a little or scrunch them all up close so that you don’t see the yarn at all.
Once you like how it looks, hang it up however you like! I mentioned before that I tied some loops about 6″ from the ends. For my window garlands, I used these loops to hook the garland up on some Command hooks on my walls. For my cubicle, I used T-pins to pin the yarn to my cubicle wall, which were easily hidden by the scraps.
Here’s what the finished product looks like on my bedroom windows:
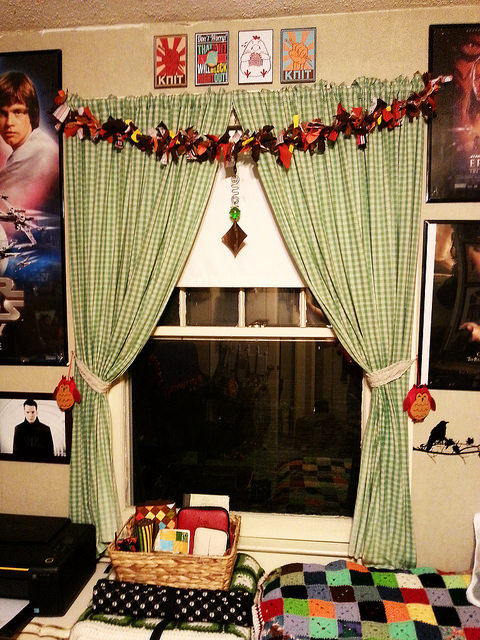
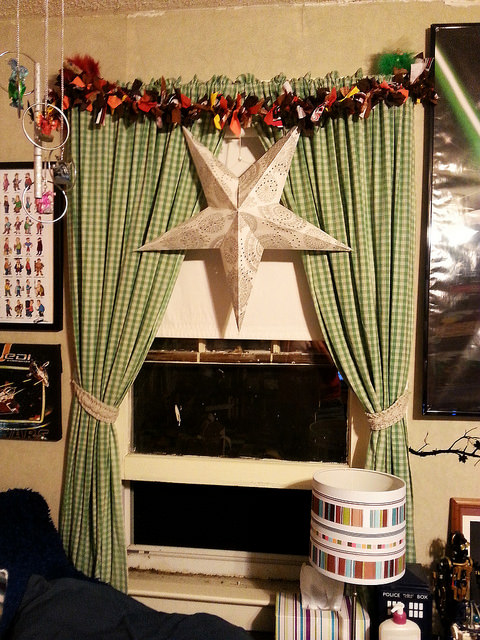
Well, that’s not quite my windows look like right now because of Halloween, but these look just as cool over some of that creepy Halloween fabric. And everyone who’s stumble across me putting these up has said that they’re really cool, so if you want something a little different to decorate for this autumn, give this a try.
